
- By

- 30/11/2022
- New South Wales, Photography Locations
Tacking Point Lighthouse, Photography Location Review
I have photographed Tacking Point Lighthouse twice, which happened ten years apart. The first time I visited this beautiful lighthouse was back in 2012 and again recently in 2022.
Both times I have looked forward to and enjoyed photographing Port Macquarie’s Lighthouse.
Tacking Point Lighthouse is a white structure with a navy blue trim running around its circumference. Like many lighthouses in NSW, it appears nicely maintained as it shines atop Tacking Point headland.
It is a lighthouse that I would call ‘cute’ given its small stature. However, size certainly doesn’t matter in this instance, as it makes a perfect subject in any landscape photo.
For this reason, it is a popular tourist destination in Port Macquarie and one of the best photography locations in the area.
How to photograph Tacking Point Lighthouse
When photographing Tacking Point Lighthouse, there are two distinct areas to position yourself. As such, I recommend visiting Tacking Point Lighthouse at least twice.
Once to photograph the lighthouse up close and from atop the headland. If you have searched online for images of Tacking Point Lighthouse, this is the most common composition you will have seen.
The second visit should be to the beach below. This area offers excellent opportunities to liven up your photos with beachside details. The lighthouse would then be positioned high on top of the headland to complete the composition.
Maybe just don’t wait ten years between photography trips if you can help it. 😉
Lighthouse (Headland)
When composing your photos of Tacking Point Lighthouse, there is little space to move around. And given that it is perched high upon the headland, I would not recommend straying too far from any trodden ground.
However, given the confined space, if you have a wide-angle lens, you can find an angle that makes for a nice photo. You can circle the lighthouse and find a spot that suits you and what is happening regarding weather, other people, etc.
There are also a couple of park benches near the lighthouse that can look great included in your photos. This composition is common and can add a nice additional element to your pictures of Tacking Point Lighthouse.
Beach below (Little Bay)
On my most recent trip to Tacking Point Lighthouse, I was torn between going down to the beach below or staying up on the headland. While the beach looked nice, I was worried I would miss out on a tremendous up-close (iconic) picture of the lighthouse.
Considering that I had been there many years before and had a couple of close-up photos, I was happy with; I felt comfortable risking it.
Boy, I was glad that I did. The beach below, which I believe is called ‘Little Bay’, is fantastic!
As the name implies, it is a little bay, making it perfect for photos and fitting everything into a single frame.
Plus, I loved the rocks!
Sleek black and grey rocks of varying shapes and sizes protrude from the sand and sea. These provided endless possibilities when filling your foreground and positioning the lighthouse in the top right of your frame.
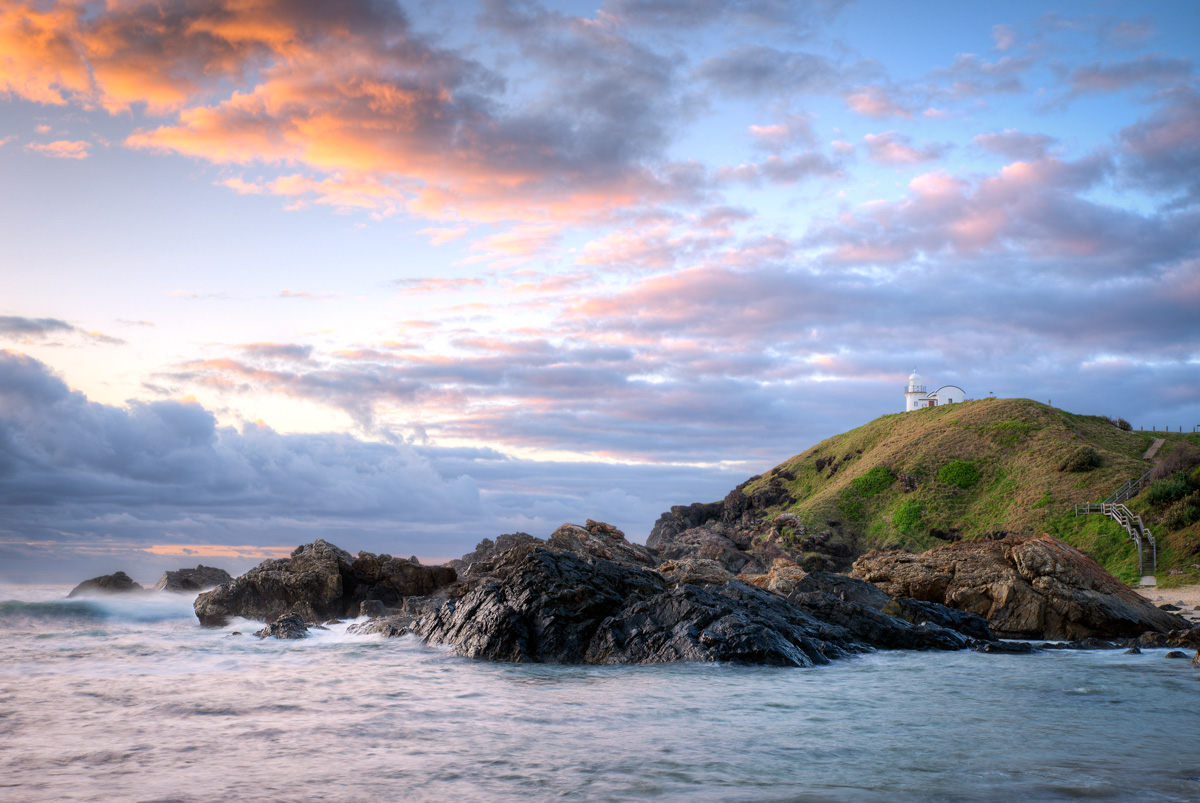
I took this photo from the beach that you will see to the left of Tacking Point Lighthouse when you arrive. It is only a small beach, which might be called Little Bay. But it allows you to fill your foreground with beautifully sleek rocks that jut out of the water and sand. I love this composition and look forward to going back and exploring it more. (HDR Image | Sunrise | November 2022)
What camera gear should take to this location
As mentioned above, there are two different areas to photograph Tacking Point Lighthouse from. Given the distance between the two, I feel you need two separate lenses.
Wide Angle Lens:
I have already touched on this, but if you plan to photograph the lighthouse up close, you will want to take a wide-angle camera lens. This will ensure that, given the confined space on the headland, you can position yourself appropriately to get the shot you want.
Zoom Lens:
I recommend a zoom lens if you are heading down to the beach. This will allow you to go wide if you want to capture the whole scene, which does look stunning. Or, if you want to crop into the headland and lighthouse itself, you can use the lens’s zoom to achieve this.
If it helps, I used my trusty 24 to 72mm lens. But it could have been a little wider and a lot longer.
I would like to have captured a tighter shot of the lighthouse. However, the 72mm did allow me to separate the lighthouse and large rocks from the rest of the scene. To see what I mean, check out the photo above.
Still, I would have loved to have cropped even tighter into the lighthouse from the beach below. With an exciting sky, this could make for an exceptional photo.
The best time to photograph Tacking Point Lighthouse
Grab your camera and head to the lighthouse for either sunrise or sunset.
While there is not much room around the lighthouse, with a wide-angle lens, you can photograph it from pretty much every angle. This means that with a lovely sunrise or sunset, you should be able to capture the sun rising or setting behind the lighthouse.
Although, I would think that the position of the sun as it rises in the morning is more photogenic than the setting sun. This is just my intuition, and you may have a difference of opinion.
Sunrise would be better for ease of visiting this location, however. Fewer people and more parking spaces will be available during the early morning hours.
Getting to Tacking Point Lighthouse
Tacking Point Lighthouse is located in Port Macquarie, on the NSW Northcoast. The lighthouse is only a 10-minute drive south of the town centre.
Upon arriving, you will see the lighthouse and a small car park below. The car park should provide enough space if you visit Tacking Point Lighthouse for sunrise. I can’t comment on how busy the car park might be. But it is safe to assume you would find it difficult to get a parking spot.
Once parked, there is only a small flight of stairs leading up to the lighthouse. Making this a very accessible location for most people.
Likewise, heading down to the beach is a flight of stairs to the left of the car park. While the steps are more numerous, most people should be able to make their way down and back up without difficulty.
Plus, these wooden stairs would make for great photos in their own right.
All in all, I was very impressed with Port Macquarie. It is a stunning place and well worth the visit. So I encourage you to make the obligatory two trips to this location if you can spare the time and stay a while.
History of Tacking Point Lighthouse:
Tacking Point Lighthouse was designed by architect James Barnet and brought to life by Shepherd and Joseph William Mortley in 1879. It was realised that a lighthouse was needed at Tacking Point after 20 separate instances of ships running aground.
At the time of its construction, it was one of only thirteen lighthouses operating around Australia.

This photo is a panorama of Tacking Point Lighthouse taken early one morning, way back on my first visit in October 2012. Forgive the slightly over-processed HDR look, but this photo shows the park bench I mentioned in this article and how this composition might work. It is a great spot! (HDR Image | Sunrise | October 2012)
Final Thoughts on Tacking Point Lighthouse
I love this lighthouse, and out of 10 would rate Tacking Point Lighthouse a 9 as a landscape photography location.
The two distinct areas in which to photograph this location make it a multi-dimensional and exciting place to examine.
For that reason, I still want to go back and photograph the lighthouse again. I think I could get a better photo of Tacking Point Lighthouse up close. This is partly due to the ten years difference between visits and, hopefully, the technology and my own techniques improving.
But I would also still love to go back and explore the beach below. I missed plenty of compositions in my rush to capture some excellent photos and get to a work conference I attended on the day.
Plus, I would like to take a longer zoom lens to get that close-in shot of the lighthouse against a dynamic sky I mentioned above.
I hope that this photography location review of Tacking Point Lighthouse has been helpful.
Now grab your camera and capture some awesome photos!


